Installing Skylights Between Trusses
Why should you never cut roof trusses to install a skylight?
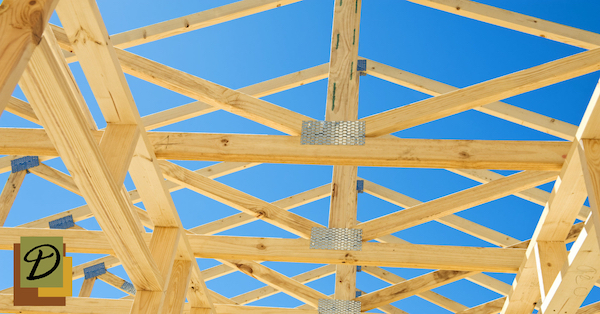
When installing skylights between trusses, the working rule is simple: the trusses do not get cut. Trusses are pre-engineered structural components, designed and stamped by a truss manufacturer to carry your roof’s loads as one connected system. Every web, chord, and metal connector plate is sized for that specific design. Cutting, notching, or drilling any member in the field voids that engineering, because the load path it was designed around no longer exists.
Your roof works as a system: the framing, the roofing materials, and the local environment together. In Central Texas that means standing up to intense summer heat, spring hail, and straight-line winds. Removing or notching a truss weakens that balanced design.
Is a truss ever modified? Yes, but it is an engineering decision, not a jobsite decision. A modification generally requires a repair detail from the truss manufacturer or a design from a qualified structural engineer, along with whatever your local building department requires. That detail specifies exactly how the opening is headed off and how the interrupted load is carried. No roofer, framer, or homeowner should cut a truss to make a skylight fit, including us.
This is why placement matters far more than force. Rather than altering the framing, the skylight is positioned in the open bay between truss sections so the structure stays fully intact. If you are unsure how your roof is built, a trusted Austin roofing company can evaluate your truss and rafter layout first.
Rafters vs. trusses: how your roof framing changes your options
Before you can answer whether a skylight will fit, you need to know which kind of roof framing you have. The two are not interchangeable, and they carry very different rules.
Conventional (stick-framed) rafters are individual dimensional lumber members (2×6, 2×8, 2×10) cut on site and run from the ridge down to the exterior wall. Each rafter carries load along its own length. Because there is no factory engineering package tied to the assembly, an opening in a rafter roof can normally be framed the way any roof opening is framed: the rafter is cut back, doubled headers are installed at the top and bottom of the opening, and the interrupted load transfers to the neighboring rafters. That is long-established framing practice, and it is why skylight openings in rafter roofs are far less constrained by the original spacing. It is still structural work: sizing the headers and confirming the load path is the framer’s or engineer’s call, and permitting may apply.
Engineered (manufactured) trusses arrive as prefabricated triangulated assemblies of smaller members, usually 2×4, joined with pressed metal connector plates. The webs and chords are not decoration; each one carries a calculated share of the load, and the assembly only works as a whole. There is no spare capacity designed in for a field cut. That is why a truss roof demands more caution: the “just head it off” approach that works on rafters does not transfer.
How to tell which you have: go into the attic and look. Webbed triangles made of 2x4s with flat metal plates at every joint mean trusses. Deeper individual boards running clean from ridge to wall, with open attic space between them, mean rafters. If your attic is finished, insulated, or you cannot see the framing clearly, that is a case for a roof inspection rather than a guess.
Neither framing type rules out a skylight. Rafter framing gives you more freedom on size and placement; truss framing means designing the skylight around the bays you already have.
How does truss spacing affect installing skylights between trusses?
When installing skylights between trusses, spacing is what determines which units fit without touching the roof structure. Most residential trusses are set on 24-inch centers, and with a 1.5-inch-thick chord that leaves about 22.5 inches of clear space between members. But 24 inches is the most common spacing, not the only one. Both 16-inch and 19.2-inch centers exist, and older or custom-framed homes vary more than spec sheets suggest. Measure before you shop.
Clear space and rough opening are not the same number. The clear space is the gap between framing members. The rough opening is the finished, framed hole the skylight is built to sit in, and it has to fit inside that clear space with room for the head and sill framing. That is why a skylight rated for a 21-inch rough opening, not a 22.5-inch one, is what fits a bay framed on 24-inch centers.
| Framing spacing (on center) | Approximate clear space | What typically fits |
|---|---|---|
| 16 inches | About 14.5 inches | Very limited; usually a tubular daylighting device or a multi-bay design |
| 19.2 inches | About 17.7 inches | Narrow units only; verify against the manufacturer’s rough opening |
| 24 inches | About 22.5 inches | The common case: units with a rough-opening width near 21 inches |
VELUX, the most widely installed skylight brand in North America, publishes rough-opening dimensions for every size code. Its “C” sizes (C01, C04, C06 and C08) all carry a 21-inch rough-opening width and differ only in length, which is what makes them the practical choice for framing on 24-inch centers. Always confirm the current published dimensions for the exact model and mounting type you are buying rather than working from a rule of thumb.
Curb-mounted vs. deck-mounted skylights, and why it affects fit
The two mounting types change how the unit meets the roof, and that bears directly on whether it fits your framing.
- Deck-mounted skylights fasten directly to the roof deck and use a low-profile manufacturer flashing kit. They sit closer to the roof plane, which most homeowners prefer visually, and their published rough opening is the framed hole itself.
- Curb-mounted skylights sit on a curb, a raised wooden box typically built from 2×4 or 2×6, framed around the opening and then flashed. Because the curb is built on top of the framed opening, curb-mount specs are commonly given as the outside curb dimension, so you have to work back to the framed opening rather than assuming the two numbers match.
Roof slope and roofing material influence the choice as well. Curb-mounted units are the usual approach on low-slope and flat roofs, where the raised curb lifts the glazing above standing water. That is a different project, covered in our guide to adding a skylight to a flat roof. On the steeper asphalt shingle and metal roofs typical across Austin, deck-mounted units with the manufacturer’s matched flashing kit are more common. Skylights also carry a rated slope range, so confirm your roof pitch falls inside it.
Getting these numbers right up front avoids ordering a skylight that will not fit, and removes any temptation to force the framing to suit a unit that was the wrong size to begin with.
What if the skylight is wider than the space between your trusses?
This is the most common sticking point on a truss roof, and there are more ways out of it than homeowners expect. Roughly in order from least to most disruptive:
- Choose a narrower unit and gain the area in length. Skylight size codes vary length independently of width. A narrower, longer skylight can deliver similar daylight through the same bay without touching a single framing member. This solves the large majority of cases.
- Relocate the skylight. Moving the opening a few feet along the roof can put it over a different bay and clear of plumbing vents, HVAC runs, or a valley. Where a skylight lands relative to a valley matters more than most people realize, and we cover it in our guide to skylights and roof valleys. The interior ceiling framing and the light shaft’s path matter here too, not just the roof.
- Use two or three smaller skylights instead of one large one. A row of units in adjacent bays often produces more even daylight than a single large opening, and each stays entirely within the existing framing. It does mean more roof penetrations to flash correctly, so installation quality matters more, not less.
- Have an approved structural modification designed. Where a large opening is genuinely required, the path is a repair detail from the truss manufacturer or a design from a qualified structural engineer, with permitting as your jurisdiction requires. This is real engineering work with real cost, and it is the only legitimate route to interrupting a truss. It is never decided on the roof that day.
- Consider a different daylighting approach. A tubular daylighting device routes light down a reflective tube from a small roof dome and can pass between framing members even on 16-inch centers. It will not give you a view, but for hallways, closets, bathrooms, and interior rooms it delivers usable daylight with a far smaller structural and waterproofing footprint.
What none of these options include is trimming a truss to make a purchase fit. If a contractor proposes that without an engineered detail already in hand, treat it as a reason to get a second opinion.
Can my roof fit a skylight without cutting a truss?
Work through these six steps in order. If you reach step six, stop and bring in the right professional.
- Identify your framing type. In the attic, webbed 2×4 triangles with metal connector plates mean engineered trusses. Deeper individual boards running ridge to wall mean conventional rafters.
- Measure the actual spacing. Measure on center from one member to the next, then measure the clear space between them. Check in the specific area where you want the skylight, not just wherever you can reach, because spacing can change across a roof.
- Find the rough-opening requirement for the skylight you want. Take it from the manufacturer’s current published dimensions for that exact model and mounting type.
- Check roof slope and roofing material. Skylights carry a rated minimum and maximum slope, and the correct flashing kit is specific to your roof covering: shingle, tile, or metal. Confirm both before ordering.
- Select a unit that fits the framing you already have. On most truss roofs framed at 24-inch centers, a skylight with a rough-opening width near 21 inches fits the existing bay with no structural work at all.
- If a truss would have to be modified, stop. Obtain a repair detail from the truss manufacturer or a design from a qualified structural engineer before any framing is touched, and confirm what your local building department requires. Do not let anyone cut first and engineer later.
Steps one through five are things a homeowner can reasonably do with a tape measure and a flashlight. Step six is not, and no amount of jobsite experience substitutes for it.
Can a skylight be added to an existing roof, or only new construction?
A skylight can be added to an existing roof, not only during new construction. Installing one in a newly built home is the cleanest option because the opening is planned into the framing from the start. That said, retrofitting an existing roof is very doable when the work is approached carefully.
Where retrofits get tricky is fitting the skylight between trusses without disturbing them. A qualified installer evaluates the roof layout, confirms the clear space, and plans the opening so the structure is never weakened.
If your roof is older or you are already considering work, combine the project with a roof inspection so any existing wear is addressed before the new opening is cut into a sound deck.
What makes a skylight watertight in Central Texas weather?
A skylight stays watertight because of correct flashing installed in the right sequence and integrated with the roof covering, not because of the window unit alone, and not because of sealant. The penetration is the weak point, so every layer has to shed water away from the opening and onto the roof below it.
A properly waterproofed skylight generally involves:
- The manufacturer’s matched flashing kit. Skylight makers supply flashing kits engineered for their specific unit and for your roof covering, with separate kits for asphalt shingle, tile, and low-profile metal. Using the matched kit is normally what keeps the installation inside the manufacturer’s own warranty terms; site-fabricated substitutes generally are not covered. Confirm the terms for your specific product.
- Sill (apron) flashing at the bottom of the unit, installed first so everything above laps over it and water is carried out onto the shingles.
- Step flashing up both sides, installed as individual pieces woven course by course with the shingles so each laps the one below. The sides are where most skylight leaks originate, and a continuous strip of metal or a bead of sealant is not a substitute for properly stepped pieces.
- Head flashing at the top, tucked under the course above so runoff coming down the slope is diverted around the unit rather than dammed behind it.
- Underlayment turned up into the opening and lapped correctly with the field underlayment. On a re-roof this is where a self-adhered ice-and-water membrane around the perimeter earns its keep. It seals around fasteners and adds a second line of defense at the most vulnerable detail on the roof. Our guide on whether ice-and-water shield is worth it in Texas covers where it makes sense here.
- Sealant only where the manufacturer specifies it, at designated laps and terminations. Sealant is a supporting detail, never the waterproofing system. Any installation whose watertightness depends on a bead of caulk will leak eventually; the only question is when.
Austin’s climate is unusually hard on roof penetrations. Sustained summer heat and UV break down exposed sealants faster than in milder climates, thermal cycling works fasteners loose, and spring hail and wind-driven rain test every seam and lap. That combination is why the flashing detail, not the skylight itself, is where installation quality actually shows up, and why this work belongs with a team that treats flashing repair and leak repair as routine.
Why skylights leak, and what is usually actually failing
When water shows up near a skylight, homeowners almost always assume the skylight has failed. Most of the time it has not. Five different problems produce the same ceiling stain, and they call for very different fixes.
- Failed flashing. The most common cause by a wide margin: step flashing that was never woven correctly, head flashing installed over instead of under the course above, or flashing reused rather than replaced during a re-roof. The unit is fine; its connection to the roof is not.
- Deteriorated seals and gaskets. The perimeter gasket and glazing seal on the unit itself age out, and UV exposure in Central Texas shortens that life. It shows as water intrusion at the frame with intact flashing all around it, and it usually means replacement rather than repair.
- A genuinely defective or damaged unit. Cracked glazing, a hail-struck acrylic dome, or a failed thermal seal showing as fogging between the panes. Less common than the first two, but real, and on an older acrylic bubble skylight, hail damage is a routine Austin finding.
- Surrounding roof damage. Water entering somewhere uphill (a lifted shingle, a failed valley, a nail pop) running down the underlayment and appearing at the first obstruction it meets, which is often the skylight. Here the skylight is the symptom, not the source, which is why a leak that only appears in certain storms frequently has nothing to do with the skylight at all. Our explanation of why a roof only leaks sometimes covers that diagnostic logic.
- Condensation mistaken for a leak. Warm, humid interior air meeting cold glazing produces water on the inside of the unit. The tells are moisture on the interior glass rather than running down from the frame, appearance in cold weather rather than during rain, and a strong correlation with bathrooms, kitchens, and under-ventilated attics. The fix there is ventilation and humidity control, not roofing work.
Working out which of the five you actually have is the entire job, and it is why “add more caulk” is such a persistent and expensive mistake. Sealing over a flashing failure hides it for a season while the decking underneath keeps getting wet.
► Watch: Why Is My Ceiling Leaking Around a Skylight?
In this Driftwood Builders Roofing video, Nick Riley investigates a ceiling leak showing up near a skylight in Austin and explains why the skylight itself is often not what failed. The surrounding roofing materials and flashing usually are.
Should a skylight be installed or replaced during a roof replacement?
If a roof replacement is already on the horizon, that is the efficient moment to deal with a skylight. Everything a skylight project needs is already happening:
- The roof covering is off anyway. Tear-off is most of the access cost of a skylight project. Doing it once instead of twice avoids paying for the same work on two separate trips.
- Flashing gets replaced rather than reused. New flashing woven into new shingles is a fundamentally better detail than new flashing tied into an existing roof, and reusing old flashing around a skylight is one of the more reliable ways to buy yourself a leak.
- The decking around the opening is visible. Any soft or delaminated sheathing at the perimeter, often the first place moisture shows up, can be found and replaced while it is exposed. Our guide on when roof decking should be replaced versus reused covers what crews look for.
- Underlayment integrates properly. The membrane can be turned into the opening and lapped correctly with the field underlayment, rather than patched around an existing curb.
When an existing skylight can reasonably stay. Not every skylight needs replacing with the roof. A unit that is relatively young, has an intact factory seal, shows no fogging between panes and no staining at the interior frame, and is not an acrylic dome nearing the end of its life can often be reflashed and left in place. The judgment call is the unit’s remaining life against the roof’s: putting a 20-year-old skylight back under a brand-new 30-year roof means opening that new roof again later to replace it. We break the cost side down in adding skylights during a roof replacement: cost now vs. add later, and you can see how the opening fits into the wider project in our overview of roof replacement in Austin.
Do roofers install skylights, and who should you hire?
Yes, roofers install skylights, and on a re-roof the roofing contractor is usually the right party to do it. The skylight itself arrives as a manufactured unit ready to install; the part that determines whether it leaks is the flashing, the underlayment integration, and how the opening ties into the framing and deck. That is roofing work.
Where a specialist adds value is on the glazing side: motorized and solar-powered venting units, blinds and control systems, light shaft construction, and unusual glass. Some projects genuinely call for both trades. On a straightforward fixed or manual venting skylight going in during a re-roof, a qualified roofing contractor handles the whole thing.
Whoever you hire, the questions worth asking are the same. What is my framing type and spacing, and what rough opening does that allow? Are you using the manufacturer’s matched flashing kit for my roof covering, and what happens to the warranty if you do not? And if a truss would have to be modified, what is your process? The right answer to that last one always involves an engineer and never a saw.
Driftwood Builders Roofing is a GAF Master Elite contractor serving Austin and Central Texas since 2005, including Cedar Park, Round Rock, Leander, Lakeway, Georgetown, and Buda. We offer free estimates, never ask for a deposit, and handle residential and commercial projects. When you are ready to plan a skylight, request a free estimate and we will help you find the right approach for your home.
Frequently Asked Questions
Can you put a skylight between roof trusses without cutting them?
Yes. Trusses set on 24-inch centers leave roughly 22.5 inches of clear space between members, and skylights with a rough-opening width near 21 inches are designed to fit inside that. Positioning the unit in the existing bay lets you add a skylight while keeping the framing fully intact.
What size skylight fits between roof trusses?
It depends on your actual spacing, so measure before you shop. On the common 24-inch-on-center framing, the clear space is about 22.5 inches and units with a rough-opening width near 21 inches fit. At 19.2-inch centers the clear space drops to roughly 17.7 inches, and at 16-inch centers to about 14.5 inches, which usually leaves only a tubular daylighting device or a multi-bay design. Always confirm the rough opening published by the manufacturer for the exact model and mounting type.
What happens if you cut a roof truss for a skylight?
Cutting a truss removes part of a pre-engineered structural assembly and voids the engineering it was designed around, because the load path it relied on no longer exists. It can lead to sagging, framing failure, and costly repairs. A truss is only ever modified under a repair detail from the truss manufacturer or a design from a qualified structural engineer, never as a jobsite decision.
Do I need an engineer to modify a roof truss?
In practice, yes. A truss modification generally requires either a repair detail from the truss manufacturer that designed it or a design from a qualified structural engineer, plus whatever your local building department requires. That documentation specifies how the opening is headed off and how the interrupted load is carried. No roofer, framer, or homeowner should cut a truss without it.
Can you install a skylight without cutting rafters?
Often yes, if you select a unit whose rough opening fits within the clear space between rafters. Where a wider opening is wanted, a rafter roof is more accommodating than a truss roof: conventional rafters can normally be cut back and headed off with doubled headers so the load transfers to neighboring rafters. That is still structural work, so header sizing and the load path are the framer’s or engineer’s call and permitting may apply.
Is it easier to install a skylight between rafters or trusses?
Rafters. Conventional stick framing has no factory engineering package tied to the assembly, so an opening can be framed with doubled headers using standard practice, which means size and placement are far less constrained. Engineered trusses have no spare capacity designed in for a field cut, so on a truss roof you design the skylight around the bays you already have.
What if the skylight is wider than the space between the trusses?
You have several options before anyone touches the framing: choose a narrower unit and gain the area in length, relocate the skylight over a different bay, use two or three smaller skylights in adjacent bays, or use a tubular daylighting device that passes between tight framing. If a large opening is genuinely required, the only legitimate route is an approved structural modification designed by the truss manufacturer or a qualified structural engineer.
Why do skylights leak, and how is that prevented?
Most skylight leaks come from the flashing rather than the unit, and five different problems produce the same ceiling stain: failed flashing, deteriorated seals and gaskets, a genuinely defective or damaged unit, surrounding roof damage that appears at the skylight, and condensation mistaken for a leak. Prevention comes from the manufacturer’s matched flashing kit installed in the correct sequence with sill, step, and head flashing plus properly lapped underlayment. Sealant is a supporting detail, never the waterproofing system.
Should an old skylight be replaced when the roof is replaced?
Usually, if the unit is near the end of its life. The roof covering is already off, new flashing is going in, and the decking around the opening is visible, so doing it together avoids paying for the same access twice. A relatively young skylight with an intact factory seal, no fogging between panes, and no staining at the interior frame can often be reflashed and left in place. The judgment call is the unit’s remaining life against the new roof’s.
Can a skylight be installed in an existing roof?
Yes, retrofitting an existing roof to accept a skylight is very doable. A qualified installer identifies the framing type, measures the clear space between members, confirms the manufacturer’s rough opening for the unit, and plans the work so the structure is never weakened.
Do roofers install skylights in Austin?
Yes. On a re-roof the roofing contractor is usually the right party, because what determines whether a skylight leaks is the flashing, the underlayment integration, and how the opening ties into the framing and deck. Specialists add value on motorized or solar venting units, blinds, light shafts, and unusual glass. Driftwood Builders Roofing serves Austin and Central Texas, offers free estimates, and can evaluate your roof layout to plan a skylight that fits between your trusses.

Author: Driftwood Builders Roofing
Driftwood Builders Roofing is a family-owned residential roofing company headquartered in Manchaca, Texas, serving Austin and the surrounding Hill Country since 2005. The company has delivered 3,700 full roof replacements and 783 repairs across 3,559 different customers over 20 years in business, with 97 years of combined construction experience across the leadership team and 74 years specifically inside Driftwood Builders. The company holds the highest contractor certifications offered by the major shingle manufacturers, including GAF Master Elite Contractor (the top 3% of GAF contractors nationally), GAF Certified Green Roofer, Owens Corning certified, TAMKO Pro Certified Contractor, and a Berridge Roof Installation Seminar Certificate for standing-seam metal roofs. Driftwood is an NRCA member, holds an Angie's List Super Service Award, is BBB Accredited, and is a GuildQuality member for verified customer satisfaction data. James Hardie certification covers the siding side of the business. Services include residential roof replacement, leak and storm-damage repair, tile roof repair, metal roofing, TPO commercial roofing, roof inspections, hail and storm damage inspections with insurance claim assistance, gutter work, and James Hardie siding. The customer-protection policy is straightforward: Only Pay Upon Completion. The company serves 22 cities across the Hill Country and Greater Austin and holds a 5-star rating across Google, GuildQuality, Angi, Nextdoor, Facebook, Thumbtack, and Yelp.
